










As the evenings draw in, there's nothing better than curling up under a soft, warm blanket. The good news? You don't need a sewing machine, or even a needle and thread, to make one. A no-sew fleece tie blanket takes an afternoon, a pair of scissors and a couple of pieces of fleece. It's a brilliant first project for beginners, a fun one to make with children, and it makes a thoughtful handmade Christmas gift too.
Why Fleece Is Perfect for a No-Sew Blanket
Polar fleece is a knitted fabric that doesn't fray when you cut it, so the edges stay neat without hemming. That's what makes the classic "cut and tie" method work. Fleece is also soft, warm, lightweight and machine washable, which makes it ideal for throws, sofa blankets, pet blankets and baby or children's blankets.
Anti-pil fleece is a great choice because it's made to resist those little bobbles that appear on cheaper fleece after washing, so your blanket stays looking smart for longer.
What You'll Need
- Two pieces of fleece of the same size: one for the front and one for the back. A plain and a print together looks fantastic.
- Sharp fabric scissors (or a rotary cutter, ruler and cutting mat if you have them).
- A tape measure or ruler and a piece of card cut to 10cm x 10cm to use as a template.
- Pins or clips to hold the layers together while you cut.
For a generous sofa throw, 1.5 metres of 150cm-wide fleece per layer gives you a square of roughly 150cm x 150cm before cutting. For a baby or pet blanket, 1 metre per layer is plenty.
Our Favourite Fleeces for Tie Blankets
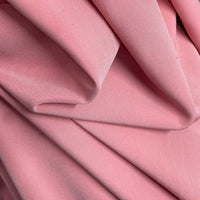
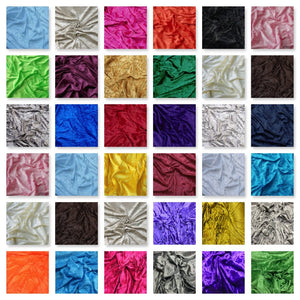
- Plain Anti-Pil Polar Fleece, 150cm: now £6.29 a metre (was £6.99). A thick, soft 364gsm fleece, currently in stock in Royal, Wine, Cerise, Dark Grey and Yellow. Perfect as the plain backing layer.
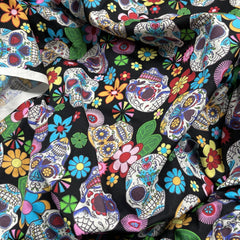
- Teddy Bears Printed Polar Fleece, Black: £7.99. A cute printed anti-pil fleece that pairs beautifully with a plain colour for a children's blanket.
- Orange Tiger Print Soft Cuddle Fleece: now £8.99 (was £10.99). A bold, fun print that's ideal for a statement throw or a little one's den.
- Mary's Lamb Soft Cuddle Fleece, Ivory Cream: now £8.00 (was £11.99). Super soft and plush, lovely for baby blankets and cosy neutral throws.
How to Make Your Tie Blanket, Step by Step
1. Prepare your fleece. Lay one piece flat on the floor or a large table, right side down. Place the second piece on top, right side up, so the wrong sides face each other. Smooth out any wrinkles.
2. Trim the edges. Cut off the selvedges (the firm woven edges along the sides) and trim both layers together so they're exactly the same size with straight edges. Pin or clip the layers so they don't slip.
3. Cut out the corners. Place your 10cm card square in each corner and cut the square out through both layers. This stops the corners from bunching up when you tie.
4. Cut the fringe. Along every side, cut strips about 2.5cm wide and 10cm deep through both layers, using the gap left by the corner square as your depth guide. Try to keep strips even, but don't worry if they're not perfect; the knots hide small differences.
5. Tie the knots. Take the top and bottom strip of each pair and tie them together in a double knot. Work your way around the whole blanket. Don't pull too tight, or the edges will pucker.
6. Give it a shake. Once every pair is tied, give your blanket a good shake and it's ready to use.
Tips for a Professional Finish
- Measure twice, cut once. A chalk line or a few pins marking the 10cm depth helps keep your fringe straight.
- Use sharp scissors. Blunt blades chew fleece and make cutting much slower.
- Mix plain and print. A plain backing lets a busy print shine, and you get two looks in one blanket.
- Wash gently. Wash fleece on a cool cycle and avoid high tumble-dry heat to keep it soft.
Ideas for Your Fleece Blanket
Once you've made one, you'll want to make more. Try a mini version as a pet bed topper, a lap blanket for a grandparent, a picnic or car blanket, or a matching pair for siblings. Because they're so quick, tie blankets make perfect Christmas gifts, and there's still plenty of time to make a few before the festive rush.
Ready to Get Cosy?
Pick a plain and a print, grab your scissors and enjoy an afternoon of easy, no-sew crafting. Browse our anti-pil polar fleece and printed fleeces now, and stock up while these colours are available. Happy making!